CIT325: Lab 1 Instructions
Objectives
The lab is designed to teach you how to work with the Fedora image and setup your working environment, such as:
- Using the basic Gnome interface
- Using the Linux command-line
- Using the SQL*Plus command-line
- Using the seeding scripts for the video store database model
- Verifying the environment
After you complete the lab objectives, you will have a working environment.
Business Scenario
All too often we attend courses that fail to qualify or explain the environment. At the end of the course we want to practice what we’ve learned but lack a configured environment.
The lab is designed to teach you how to use the Fedora VM environment built for the class, which you can download and install on a Windows or Mac VMware machine. Alternatively, you can download the VirtualBox image for either native OS environment. Naturally, you also can run virtualization from Unix or Linux.
Help Section
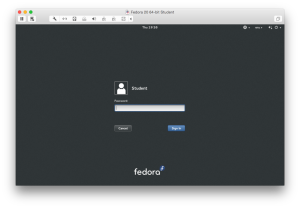
After you copy and start the Fedora image, you need to log into the instance as the student user. Login as the student user with the cangetin password, as shown in the following screen shots:
Instructional Material →
- Open and learn the basics of using the Fedora Gnome interface:
Instruction Details →
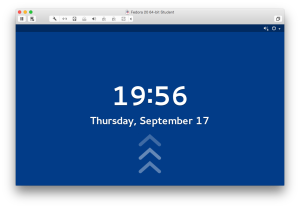
- You should see the following screen when you launch the Fedora environment. You should click the space bar inside the window to move to the next step.
- You should see the following screen after clicking the space bar. Enter the password for the
studentuser and click the return key.
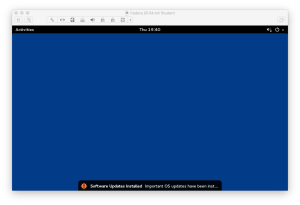
- It’s possible that the Fedora instance may apply software updates. Click any update message like the one below and it disappears.
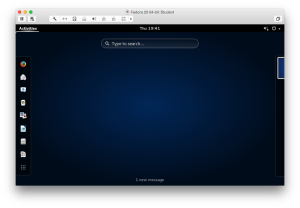
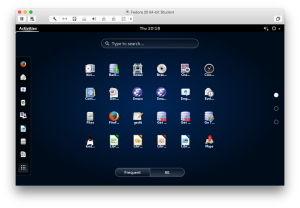
- Click on the Activities menu in the upper left hand corner and it displays a search box with a list of applications on the left. The nine dots icon at the bottom of the list opens a window with available applications. Click on the nine dots icon and you see the following image.
- Click on the nine dots icon and you see the following image.
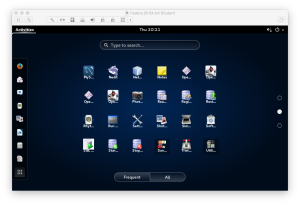
- The list of applications displays a list of radio buttons on the right side of the display. Click on the second radio button and you see the following image.
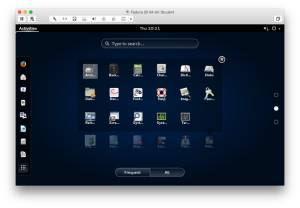
- The list of applications displays the Utility icon as the right-most icon on the last row. Click on the Utilities icon to display the following image.
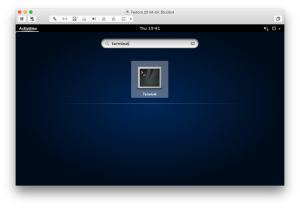
- The list of utility applications displays the Terminal icon as the right-most icon on the last row. Click on the Terminal icon to display a Terminal window, or alternatively click in the search box and enter
terminaland click the return key, which displays the following image.
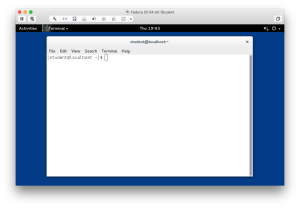
- After clicking on the Terminal icon or typing the terminal string and clicking the return key, you will see the following window:
- Navigate to the
lab1directory from thestudenthome directory:
Instruction Details →
@“ symbol, and the machine name inside square brackets followed by a “$“ symbol. This type of prompt is configured by the user’s .bashrc (Bash Shell resource file). You can determine the user’s home directory by using the pwd command, which means the Present Working Directory command.
[student@localhost ~]$ pwd |
It will display:
/home/student |
You can list the contents of the directory (also known as a folder) with the ls command, which is an abbreviation list.
[student@localhost ~]$ ls |
It will display the following directories in blue text:
Code Documents Music Pictures Templates workspace Data Downloads NetBeans Projects Public Videos Desktop eclipse oradiag_student Stage vmware |
You change directories with the cd command, which is stands for change directory. You can change to a subdirectory of the current directory with the following syntax. You should note that there isn’t a forward slash before the first level subdiretory.
[student@localhost ~]$ cd Data/cit225/oracle/lab1 |
Then, issue a pwd command to ensure you’re in the right place:
[student@localhost ~]$ pwd |
It will displays:
/home/student/Data/cit225/oracle/lab1 |
You can list the contents of the /home/student/Data/cit225/lab1 directory with the ls command. You should see the following file:
[student@localhost ~]$ ls |
It will display the following file in green text:
apply_oracle_lab1.sql |
- Connect to
sqlplusas thestudentuser:
Instruction Details →
sqlplus command. You can provide the user name only or the user name, a forward slash, and password.
Before you connect with the sqlplus program, you should verify that it’s in your environment’s $PATH variable. You can do that with the which command, like this:
[student@localhost ~]$ which sqlplus |
It will display:
/u01/app/oracle/product/11.2.0/xe/bin/sqlplus |
You can connect to the Oracle instance with the sqlplus utility:
[student@localhost ~]$ sqlplus student/student |
It will display:
SQL*Plus: Release 11.2.0.2.0 Production on Thu Sep 17 22:31:32 2015 Copyright (c) 1982, 2011, Oracle. All rights reserved. Connected to: Oracle Database 11g Express Edition Release 11.2.0.2.0 - 64bit Production SQL> |
The system user’s password is cangetin but only use the system account when necessary.
Lab Description
[8 points] Click the Lab Instructions link to open the instructions inside the current webpage.
Run the apply_oracle_lab1.sql script, which runs three scripts: (a) the cleanup_oracle.sql script and (b) the create_video_store.sql script.
Lab Instructions →
When you run the sqlplus command from a directory, that directory becomes the home directory. Inside the SQL*Plus environment, you can access any file in the local directory by simply prefacing it with an “@“ symbol. If the file doesn’t exist it raises and exception.
You can check for the existence of the file with the following command:
SQL> !ls |
It will display:
apply_oracle_lab1.sql |
You call the file in sqlplus like this:
SQL> @apply_oracle_lab1.sql |
It should contain the following two calls:
@/home/student/Data/cit325/lib/cleanup_oracle.sql @/home/student/Data/cit325/lib/Oracle12cPLSQLCode/Introduction/create_video_store.sql |
and they do the following:
- The
cleanup_oracle.sqlscript was written to cleanup an Oracle database schema while leaving an Oracle APEX 4 installation untouched. You will need to modify this script if you upgrade Oracle APEX 4. - The
create_video_store.sqlscript was written for the Oracle Database 12c PL/SQL Programming book and creates a sample video store model for the book and these labs.
The create_video_store.sql script will display the following query after the creation script:
COL full_name FORMAT A20 COL title FORMAT A28 COL product FORMAT A8 SELECT DISTINCT CASE WHEN c.middle_name IS NOT NULL THEN c.last_name || ' ' || SUBSTR(c.middle_name,1,3) || ' ' || c.first_name ELSE c.last_name || ' ' || c.first_name END AS full_name , i.item_title AS title , SUBSTR(cl.common_lookup_meaning,1,3) AS product FROM contact c JOIN rental r ON c.contact_id = r.customer_id JOIN rental_item ri ON r.rental_id = ri.rental_id JOIN item i ON ri.item_id = i.item_id JOIN common_lookup cl ON i.item_type = cl.common_lookup_id WHERE i.item_title IN ('Camelot' ,'Cars' ,'Hook' ,'RoboCop' ,'Star Wars I' ,'Star Wars II' ,'Star Wars III' ,'The Hunt for Red October') AND c.last_name IN ('Sweeney','Vizquel','Winn') ORDER BY 1; |
It should show :
FULL_NAME TITLE PRODUCT -------------------- ---------------------------- -------- Sweeney M Ian Camelot DVD Sweeney M Ian The Hunt for Red October DVD Sweeney Matthew Camelot DVD Sweeney Matthew The Hunt for Red October DVD Sweeney Meaghan Camelot DVD Sweeney Meaghan The Hunt for Red October DVD Vizquel Doreen Camelot DVD Vizquel Doreen The Hunt for Red October DVD Vizquel Oscar Camelot DVD Vizquel Oscar The Hunt for Red October DVD Winn Brian Camelot DVD Winn Brian The Hunt for Red October DVD Winn Randi Camelot DVD Winn Randi The Hunt for Red October DVD 14 rows selected. |
Test Case
[2 points] Click the Test Case Instructions link to open the instructions inside the current webpage.
Test Case Instructions →
Oracle maintains the data dictionary inside the sys schema but it provides access to narrow views of the data dictionary in the user_ views. You do need to filter out tables created to support the APEX installation. Here’s how you see the tables created in the student schema of an Oracle database instance while excluding the APEX tables:
Query the data dictionary to find the tables created by the create_oracle_store.sql script.
SQL> SELECT table_name 2 FROM user_tables 3 WHERE table_name NOT IN ('EMP','DEPT','ACCOUNT_LIST','CALENDAR','AIRPORT','TRANSACTION','PRICE') 4 AND NOT table_name LIKE 'DEMO%' 5 AND NOT table_name LIKE 'APEX%' 6 ORDER BY table_name; |
It will display:
TABLE_NAME ------------------ ADDRESS COMMON_LOOKUP CONTACT ITEM MEMBER RENTAL RENTAL_ITEM STREET_ADDRESS SYSTEM_USER TELEPHONE 10 rows selected. |
