CIT225: Lab 1 Instructions
Objectives
The lab teaches you how to work with the Linux and Oracle environments. It requires you to download and install on your local Windows-based computer a copy of VMware Workstation or on your local MacOS-based computer a copy of VMware Fusion from https://www.vmware.com.
When installing VMware on our machine, choose the free 30 day installation option. You will receive an email with a code for a free copy of the software on Friday of the first week of class. The email will instruct you in how you convert your free 30-day license to a one-year license at no cost to you.
Secure a copy of the VMware instance for the course from the URL or from the instructor. After you have downloaded and installed VMware, open the VMware instance with VMware Workstation or VMware Fusion. When prompted whether you copied it or moved it, choose moved it.
After you have a working VMware instance, the lap helps you learn:
- How to the Gnome menus of the Linux environment
- How to use the Linux Command-Line Interface (CLI)
- How to connect to SQL*Plus as the student user
- How to use the SQL*Plus environment
- How to write, run, and unit test a small script file to create tables
- How to write, run, and unit test a small script file to add data to the tables
Business Scenario
Building data-centric application software requires a working environment. When you arrive at a new employer, you need to learn how to work effectively in their environment.
The lab is designed to teach you how work in the Linux and Oracle environment for the course. Your ability to succeed in the course depends on whether you dedicate adequate time to understand how the environment and command-line SQL*Plus interfaces work.
Help Section
There are many moving parts in the Linux and Oracle environment. You are asked to do the following three things before beginning the weekly lab assignment.
You are asked to review the following preparation material:
- Read IntroductionToDatabasesUnderstanding Databases essay
- How to use Oracle’s APEX utility to create tables
- How to query data from tables in the database using Oracle’s APEX utility
- How to use Oracle’s SQL*Developer tool as an Integrated Development Environment (IDE)
- Read and test all elements of the SQL Interactive and Batch Processing tutorial, provided in Appendix A of the Oracle Database 12c PL/SQL Programming book (pages 622-644).
- Read and test all elements of the Oracle SQL Developer Interface tutorial, provided in Appendix A of the Oracle Database 12c PL/SQL Programming book (pages 644-652).
- Read about the
SELECTstatement and its six clauses:
Oracle’s APEX tool is a browser-based Integrated Development Environment (IDE). Oracle’s SQL Developer is a Java-based Integrated Development Environment (IDE).
Instructional Material →
The supplemental materials depend on your reading and understanding the preparation material qualified earlier in this lab. The coding segments below show you:
- How to create the
grandmaandtweetie_birdtables - How to insert rows into each of these table in sequential order
- How to create an integration script that tests both unit tests
The instructions walk you through creating three script files. One script file creates the grandma and tweetie_bird tables and a second script file enters data into the tables in sequence. Each of the first two script files constitutes a unit test. The third script file calls the two script files in sequence and by so doing integrates the behavior of the first two script files.
- Unit Test Module 1
- Unit Test Module 2
- Integration Test Module
You can do this assignment by launching the gedit editor. Then, you can copy the following code contents into a create_sample_tables.sql file. You should save the file in your /user/student/Data/cit225/oracle/lab1 directory.
1 2 3 4 5 6 7 8 9 10 11 12 13 14 15 16 17 18 19 20 21 22 23 24 25 26 27 28 29 30 31 32 33 34 35 36 37 38 39 40 41 42 43 44 45 46 47 48 49 50 51 52 53 54 55 56 57 58 59 60 61 62 | /* Conditionally drop the GRANDMA and TWEETIE_BIRD tables, and the GRANDMA_SEQ and TWEETIE_BIRD sequences. */ BEGIN FOR i IN (SELECT object_name , object_type FROM user_objects WHERE object_name IN ('GRANDMA','GRANDMA_SEQ' ,'TWEETIE_BIRD','TWEETIE_BIRD_SEQ') ORDER BY object_type ) LOOP IF i.object_type = 'TABLE' THEN EXECUTE IMMEDIATE 'DROP TABLE '||i.object_name||' CASCADE CONSTRAINTS'; ELSE EXECUTE IMMEDIATE 'DROP SEQUENCE '||i.object_name; END IF; END LOOP; END; / /* Create the grandma table: - A natural key of grandma_house and grandma_name columns. - A surrogate and primary key column that uses the table name plus _ID suffix. - A primary key constraint on the surrogate key column. - A uq_grandma unique index across the two natural key columns. */ CREATE TABLE GRANDMA ( grandma_id NUMBER CONSTRAINT pk_grandma PRIMARY KEY , grandma_house VARCHAR2(30) CONSTRAINT nn_grandma_1 NOT NULL , grandma_name VARCHAR2(30) CONSTRAINT nn_grandma_2 NOT NULL , CONSTRAINT uq_grandma UNIQUE (grandma_house, grandma_name)); /* Create the grandma_seq sequence. */ CREATE SEQUENCE grandma_seq; /* Create the tweetie_bird table with: - A natural key of tweetie_bird_house and tweetie_bird columns. - A surrogate and primary key column that uses the table name - plus an _ID suffix. - A primary key constraint on the surrogate key column. - A foreign key constraint on the grandma_id column of the grandma table. - A uq_tweetie_bird unique index across the two natural key columns. */ CREATE TABLE TWEETIE_BIRD ( tweetie_bird_id NUMBER CONSTRAINT tweetie_bird_nn1 NOT NULL , tweetie_bird_name VARCHAR2(30) CONSTRAINT tweetie_bird_nn2 NOT NULL , grandma_id NUMBER CONSTRAINT tweetie_bird_nn3 NOT NULL , CONSTRAINT pk_tweetie_bird PRIMARY KEY (tweetie_bird_id) , CONSTRAINT fk_tweetie_bird FOREIGN KEY (grandma_id) REFERENCES GRANDMA (GRANDMA_ID) , CONSTRAINT uq_tweetie_bird UNIQUE (tweetie_bird_name)); /* Create the tweetie_bird_seq sequence. */ CREATE SEQUENCE tweetie_bird_seq; /* Verify that you successfully created the two tables by querying the data dictionary. The data dictionary stores information about all structures, like tables and constraints, that you create in any database. */ SELECT table_name FROM user_tables WHERE table_name IN ('GRANDMA','TWEETIE_BIRD') ORDER BY table_name; |
After you save the create_sample_tables.sql file, you should navigate to the /user/student/Data/cit225/oracle/lab1 directory and logon to the SQL*Plus environment like this:
sqlplus student/student |
From the SQL> command prompt, you can run the create_sample_tables.sql script file with the following relative path command, which relies on your launching SQL*Plus (sqlplus) from the same directory where the file you want to run is stored.
@create_sample_tables.sql |
The script should show you that it created two tables by returning the following from the data dictionary query:
TABLE_NAME
------------------------------
GRANDMA
TWEETIE_BIRD |
You have now completed your first unit test module. You have successfully written and deployed a small script file and performed a unit test on its functionality.
There are a few things you need to understand before you add data into the tables. These are the rules that govern how you interact with data in a multiuser database system.
Insert statements are ACID-compliant transactions. ACID is an acronym for Atomic, Consistency, Isolated, and Durable. Atomic transactions are all or nothing transactions. Consistency means that whether you process the inserts serially or in parallel will succeed. Isolated means that you can’t see partial results until they’re complete. Durable means that the transactions becomes permanent.
While every INSERT, UPDATE, and DELETE statement is ACID compliant against a single table, SQL provides Transaction Control Language (TCL) to manage interactions across more than two tables. The following example will show you how to add data into a pair of tables.
The INSERT statement will use the .NEXTVAL pseudo column for primary keys and the .CURRVAL pseudo column for foreign keys. At this point, you simply have to trust this syntax that will be explained in the subsequent week’s content.
You can add the data by creating another small script file. You launch or relaunch the gedit editor. Like the prior unit test module, you copy the following code contents into a new file. You should call it the add_data_in_tables.sql file, and store the add_data_in_tables.sql file in your /user/student/Data/cit225/oracle/lab1 directory.
/* Set the save point like a book mark sets a page number. If any part of the transaction fails, you return to this point by rolling back the parts that did complete. */ SAVEPOINT starting_place; /* Insert into grandma table. */ INSERT INTO grandma ( grandma_id , grandma_house , grandma_name ) VALUES ( grandma_seq.NEXTVAL ,'Yellow' ,'Hazel'); /* Insert into tweetie_bird table. */ INSERT INTO tweetie_bird ( tweetie_bird_id , tweetie_bird_name , grandma_id ) VALUES ( tweetie_bird_seq.NEXTVAL ,'Henry' , grandma_seq.CURRVAL ); /* Query the joined results of the insert into two tables. */ COL grandma_house FORMAT A14 HEADING "Grandma|House" COL grandma_name FORMAT A14 HEADING "Grandma|Name" COL tweetie_bird_name FORMAT A14 HEADING "Tweetie Bird|Name" SELECT grandma_house , grandma_name , tweetie_bird_name FROM grandma g JOIN tweetie_bird tb ON g.grandma_id = tb.grandma_id; |
If one of the inserts failed, you would issue a:
ROLLBACK TO starting_place; |
A ROLLBACK statement like that undoes everything after the SAVEPOINT statement. It basically returns the data in the grandma and tweetie_bird tables to their states before you attempted the INSERT statements.
If both of the INSERT statements succeeded, you would make their changes permanent with a:
COMMIT; |
The COMMIT statement makes your changes permanent and visible to other sessions of the same student user and to other database users to whom you’ve granted access to the grandma and tweetie_bird tables.
For the purpose of this lab you do not need to use a COMMIT or ROLLBACK statement. You unit test your add_data_in_tables.sql file by connecting to the sqlplus utility. As the student user, you run the file with the following syntax:
@add_data_in_tables.sql |
The script should show you that it created two tables by returning the following from the data dictionary query:
Grandma Grandma Tweetie Bird House Name Name -------------- -------------- -------------- Yellow Hazel Henry |
You have now successfully completed the second unit test.
An integration script calls one or more unit test scripts. You write integration test scripts to package or bundle your code components by modules.
You create your integration script inside the gedit editor. You should create the apply_sample_script.sql integration script in the /home/student/Data/cit225/oracle/lab directory, and it should call both of the unit test programs, like the following example file.
-- Run the unit test scripts. @/home/student/Data/cit225/oracle/lab1/create_sample_tables.sql @/home/student/Data/cit225/oracle/lab1/add_data_in_tables.sql -- Put any program logic specific to the integration script. SPOOL apply_sample_lab.txt -- Insert your SQL statements here ... -- start with the validation scripts ... SPOOL OFF -- ------------------------------------------------------------------ -- This is necessary to avoid a resource busy error. You can -- inadvertently create a resource busy error when testing in two -- concurrent SQL*Plus sessions unless you provide an explicit -- COMMIT; statement. -- ------------------------------------------------------------------ COMMIT; |
You can test the apply_sample_lab.sql with the following syntax:
@apply_sample_lab.sql |
You have successfully run the integration test after you run the apply_sample_lab.sql script file.
The lab has five parts. The individual parts are explained in the lab detail.
Lab Description
[20 points] Click the Lab Instructions link to open the instructions inside the current webpage.
The lab requires that you test the elements of the environment and write one integration script. The integration script calls two unit test programs found in the following directory:
/home/student/Data/cit225/oracle/lib |
Please perform these tasks after you have downloaded VMware and opened the Fedora virtual instance.
Lab Instructions →
- [4 points] Open and learn the basics of using the Fedora Gnome interface:
Instruction Details ↓
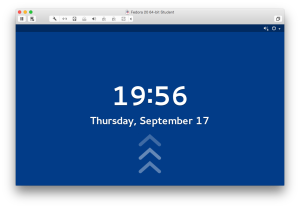
- You should see the following screen when you launch the Fedora environment. You should click the space bar inside the window to move to the next step.
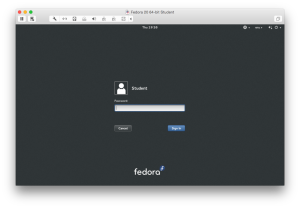
- You should see the following screen after clicking the space bar. Enter the password for the
studentuser and click the return key.
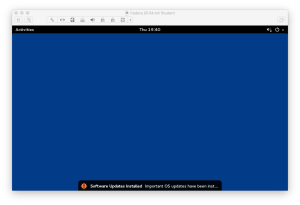
- It’s possible that the Fedora instance may apply software updates. Click any update message like the one below and it disappears.
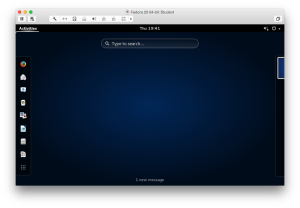
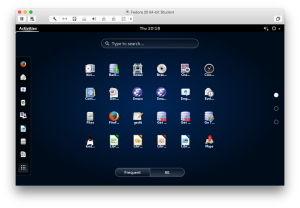
- Click on the Activities menu in the upper left hand corner and it displays a search box with a list of applications on the left. The nine dots icon at the bottom of the list opens a window with available applications. Click on the nine dots icon and you see the following image.
- Click on the nine dots icon and you see the following image.
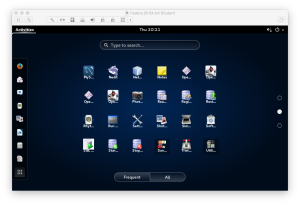
- The list of applications displays a list of radio buttons on the right side of the display. Click on the second radio button and you see the following image.
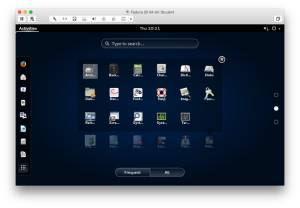
- The list of applications displays the Utility icon as the right-most icon on the last row. Click on the Utilities icon to display the following image.
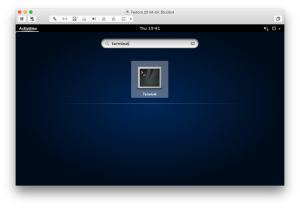
- The list of utility applications displays the Terminal icon as the right-most icon on the last row. Click on the Terminal icon to display a Terminal window, or alternatively click in the search box and enter
terminaland click the return key, which displays the following image.
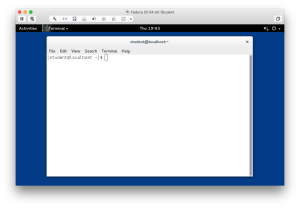
- After clicking on the Terminal icon or typing the terminal string and clicking the return key, you will see the following window:
- [4 points] Navigate to the
lab1directory from thestudenthome directory:
Instruction Details ↓
@“ symbol, and the machine name inside square brackets followed by a “$“ symbol. This type of prompt is configured by the user’s .bashrc (Bash Shell resource file). You can determine the user’s home directory by using the pwd command, which means the Present Working Directory command.
[student@localhost ~]$ pwd |
It will display:
/home/student |
You can list the contents of the directory (also known as a folder) with the ls command, which is an abbreviation list.
[student@localhost ~]$ ls |
It will display the following directories in blue text:
Code Documents Music Pictures Templates workspace Data Downloads NetBeans Projects Public Videos Desktop eclipse oradiag_student Stage vmware |
You change directories with the cd command, which is stands for change directory. You can change to a subdirectory of the current directory with the following syntax. You should note that there isn’t a forward slash before the first level subdiretory.
[student@localhost ~]$ cd Data/cit225/oracle/lab1 |
Then, issue a pwd command to ensure you’re in the right place:
[student@localhost ~]$ pwd |
It will displays:
/home/student/Data/cit225/oracle/lab1 |
You can list the contents of the /home/student/Data/cit225/oracle/lab1 directory with the ls command. You should see the following file:
[student@localhost ~]$ ls |
It will display the following file in green text:
apply_oracle_lab1.sql |
- [4 points] Connect to
sqlplusas the student user:
Instruction Details ↓
sqlplus command. You can provide the user name only or the user name, a forward slash, and password.
Before you connect with the sqlplus program, you should verify that it’s in your environment’s $PATH variable. You can do that with the which command, like this:
[student@localhost ~]$ which sqlplus |
It will display:
/u01/app/oracle/product/11.2.0/xe/bin/sqlplus |
You can connect to the Oracle instance with the sqlplus utility:
[student@localhost ~]$ sqlplus student/student |
It will display:
SQL*Plus: Release 11.2.0.2.0 Production on Thu Sep 17 22:31:32 2015 Copyright (c) 1982, 2011, Oracle. All rights reserved. Connected to: Oracle Database 11g Express Edition Release 11.2.0.2.0 - 64bit Production SQL> |
- [4 points] Run the
apply_oracle_lab1.sqlscript, which runs three scripts: (a) thecleanup_oracle.sqlscript, (b) thecreate_oracle_store.sqlscript, and (c) theseed_oracle_store.sqlscript.
Instruction Details ↓
sqlplus command from a directory, that directory becomes the home directory. Inside the SQL*Plus environment, you can access any file in the local directory by simply prefacing it with an “@“ symbol. If the file doesn’t exist it raises and exception.
You can check for the existence of the file with the following command:
SQL> !ls |
It will display:
apply_oracle_lab1.sql |
You call the file in sqlplus like this:
SQL> @apply_oracle_lab1.sql |
It will display:
FULL_NAME TITLE PRODUCT CHECK_OUT_D RETURN_DATE ---------------- ------------------------------ ------- ----------- ----------- Brian Winn RoboCop XBO 17-SEP-15 22-SEP-15 Brian Winn The Hunt for Red October DVD 17-SEP-15 22-SEP-15 Doreen Vizquel Camelot Blu 17-SEP-15 22-SEP-15 Doreen Vizquel I Remember Mama Blu 17-SEP-15 22-SEP-15 Oscar Vizquel Star Wars I DVD 17-SEP-15 22-SEP-15 Oscar Vizquel Star Wars II DVD 17-SEP-15 22-SEP-15 Oscar Vizquel Star Wars III DVD 17-SEP-15 22-SEP-15 Ian M Sweeney Cars XBO 17-SEP-15 22-SEP-15 Meaghan Sweeney Hook Blu 17-SEP-15 22-SEP-15 9 rows selected. |
- [4 points] Query the data dictionary to find the tables created by the
create_oracle_store.sqlscript.:
Instruction Details ↓
sys schema but it provides access to narrow views of the data dictionary in the user_ views. You do need to filter out tables created to support the APEX installation. Here’s how you see the tables created in the student schema of an Oracle database instance while excluding the APEX tables:
SQL> SELECT table_name 2 FROM user_tables 3 WHERE table_name NOT IN ('EMP','DEPT') 4 AND NOT table_name LIKE 'DEMO%' 5 AND NOT table_name LIKE 'APEX%' 6 ORDER BY table_name; |
It will display:
TABLE_NAME ------------------ ADDRESS COMMON_LOOKUP CONTACT ITEM MEMBER RENTAL RENTAL_ITEM STREET_ADDRESS SYSTEM_USER TELEPHONE 10 rows selected. |
